
Marking up screenshots
This is the part clients actually enjoy. Instead of describing where the problem is, they point at it.
How it works
- Add a screenshot, then click Mark up.
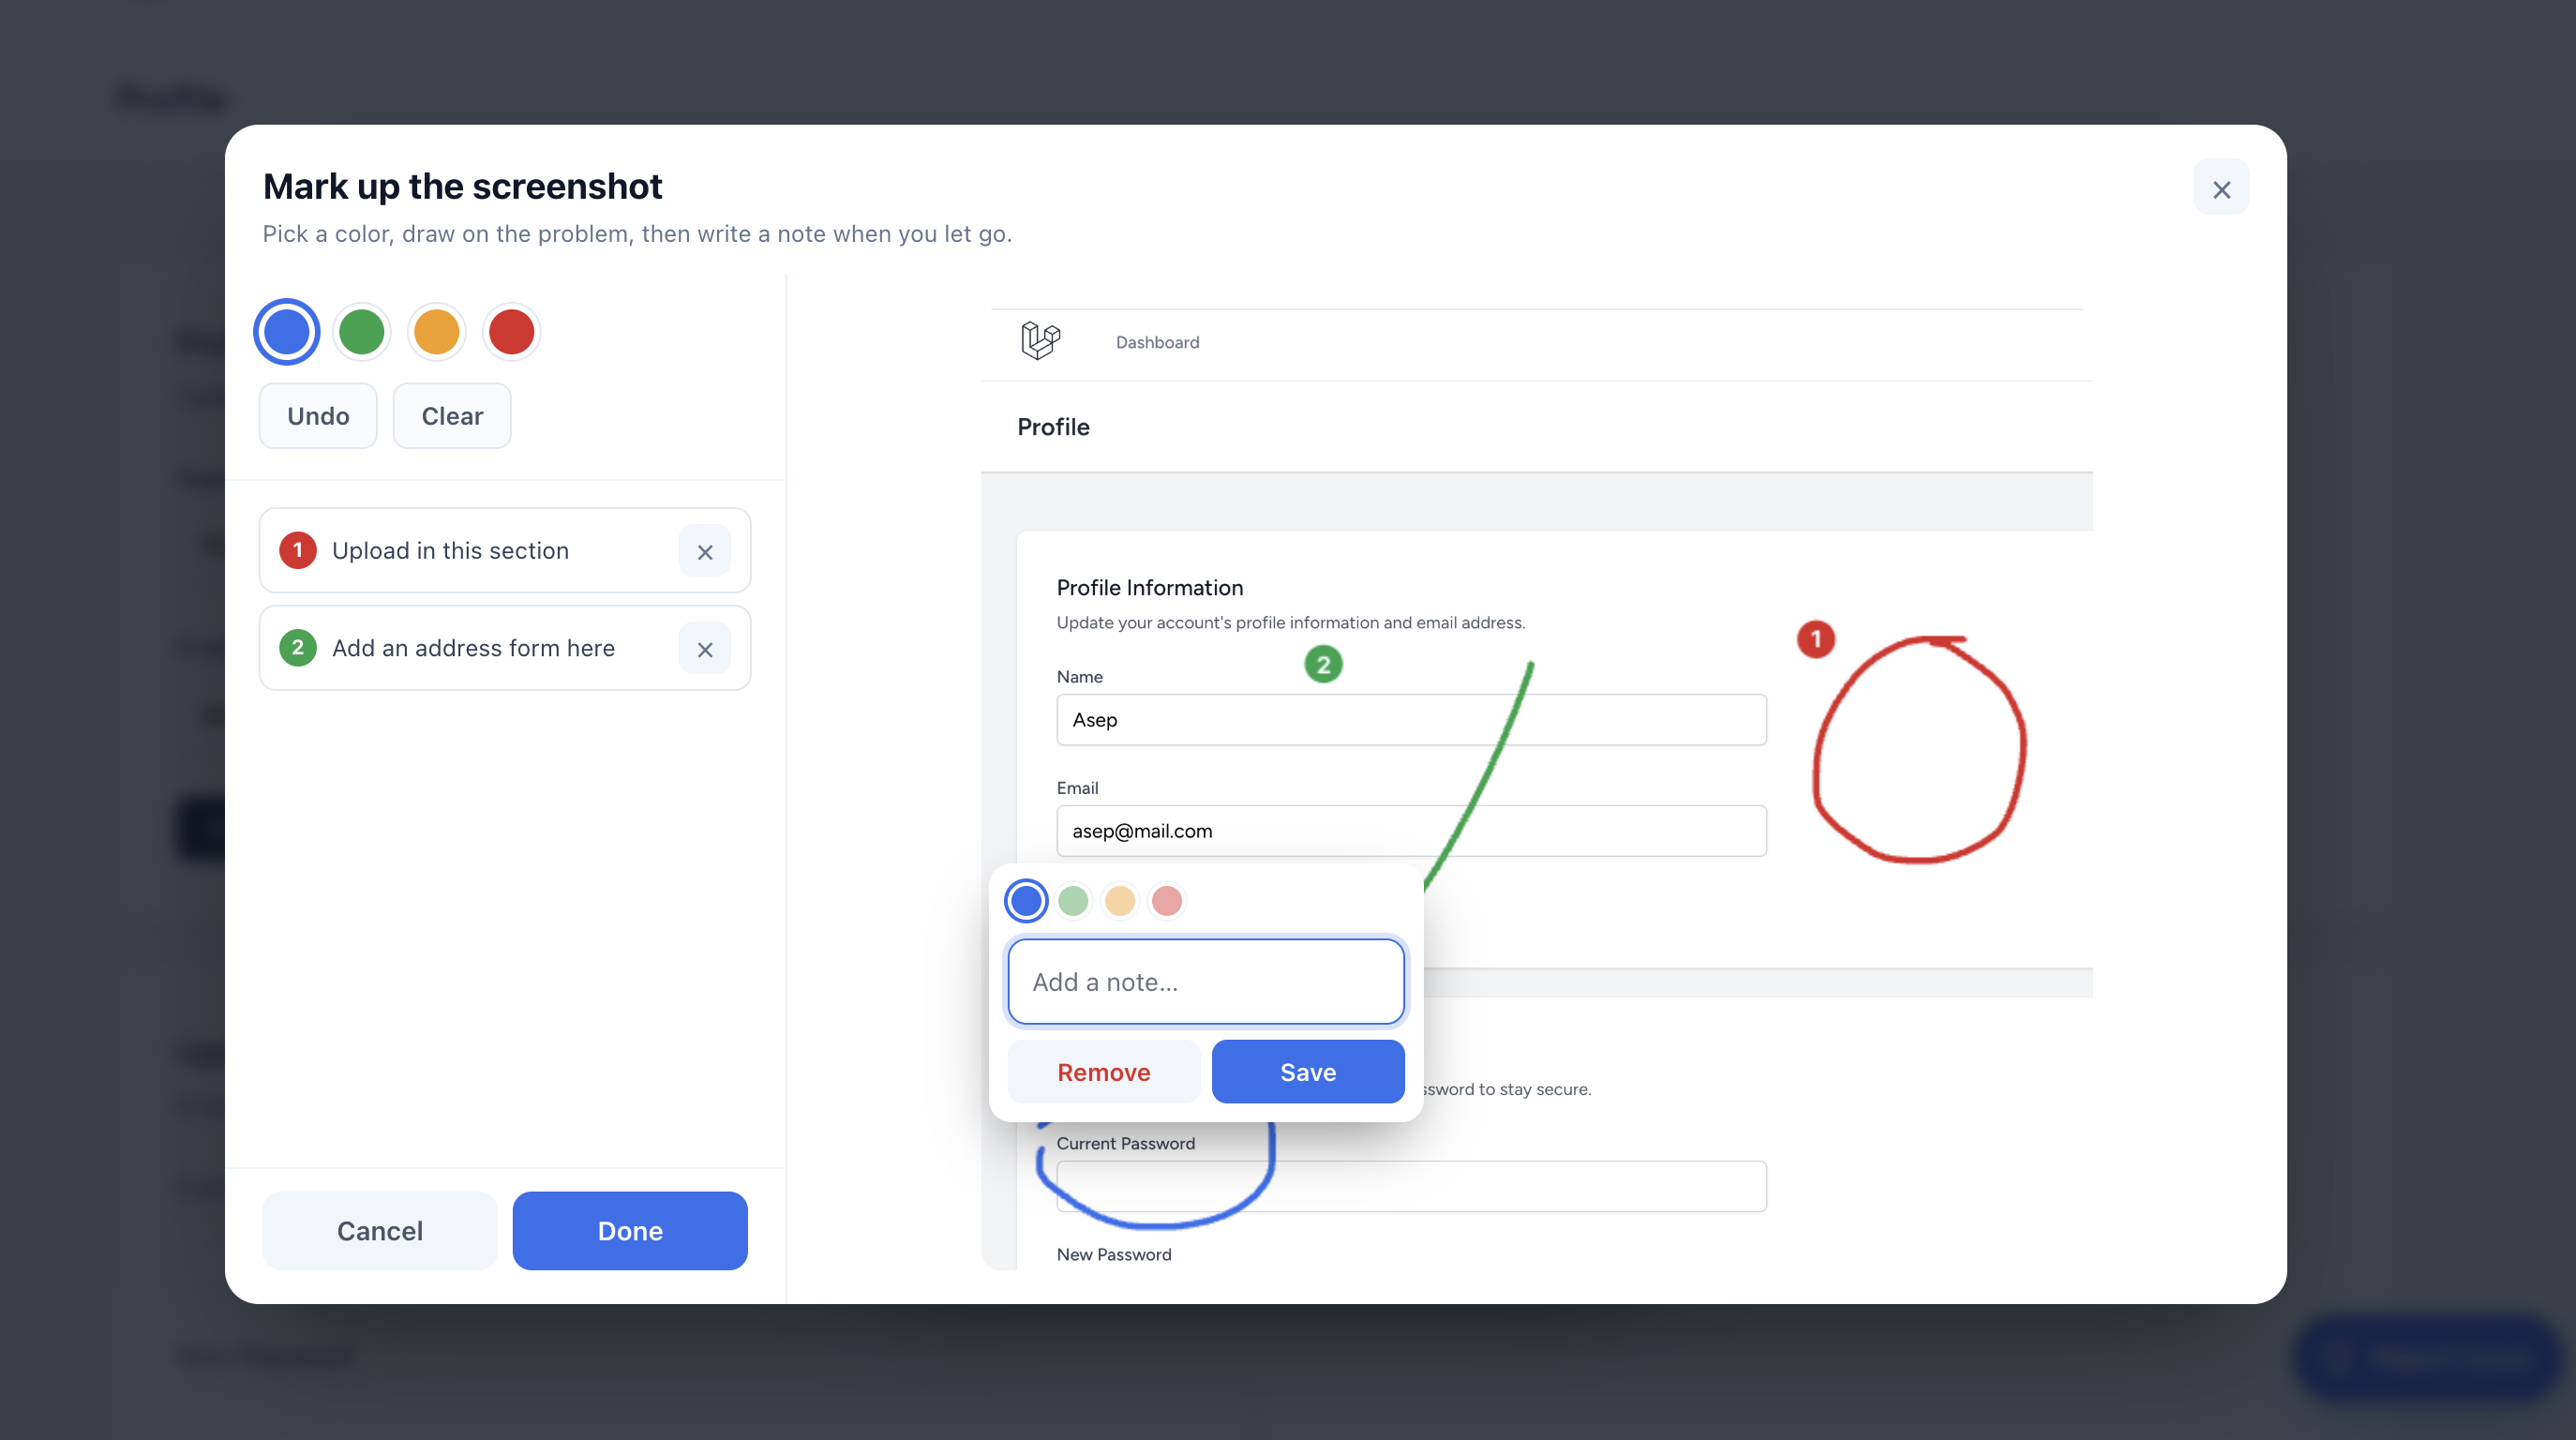
- Pick one of four colors and draw on the problem.
- When they let go, a small note box pops up right where they drew. They type a note and save.
- Repeat for as many spots as needed. Undo and Clear are there for mistakes.
On desktop the editor is a roomy two-pane layout: the image on one side, the colors and notes on the other. On mobile it stacks.
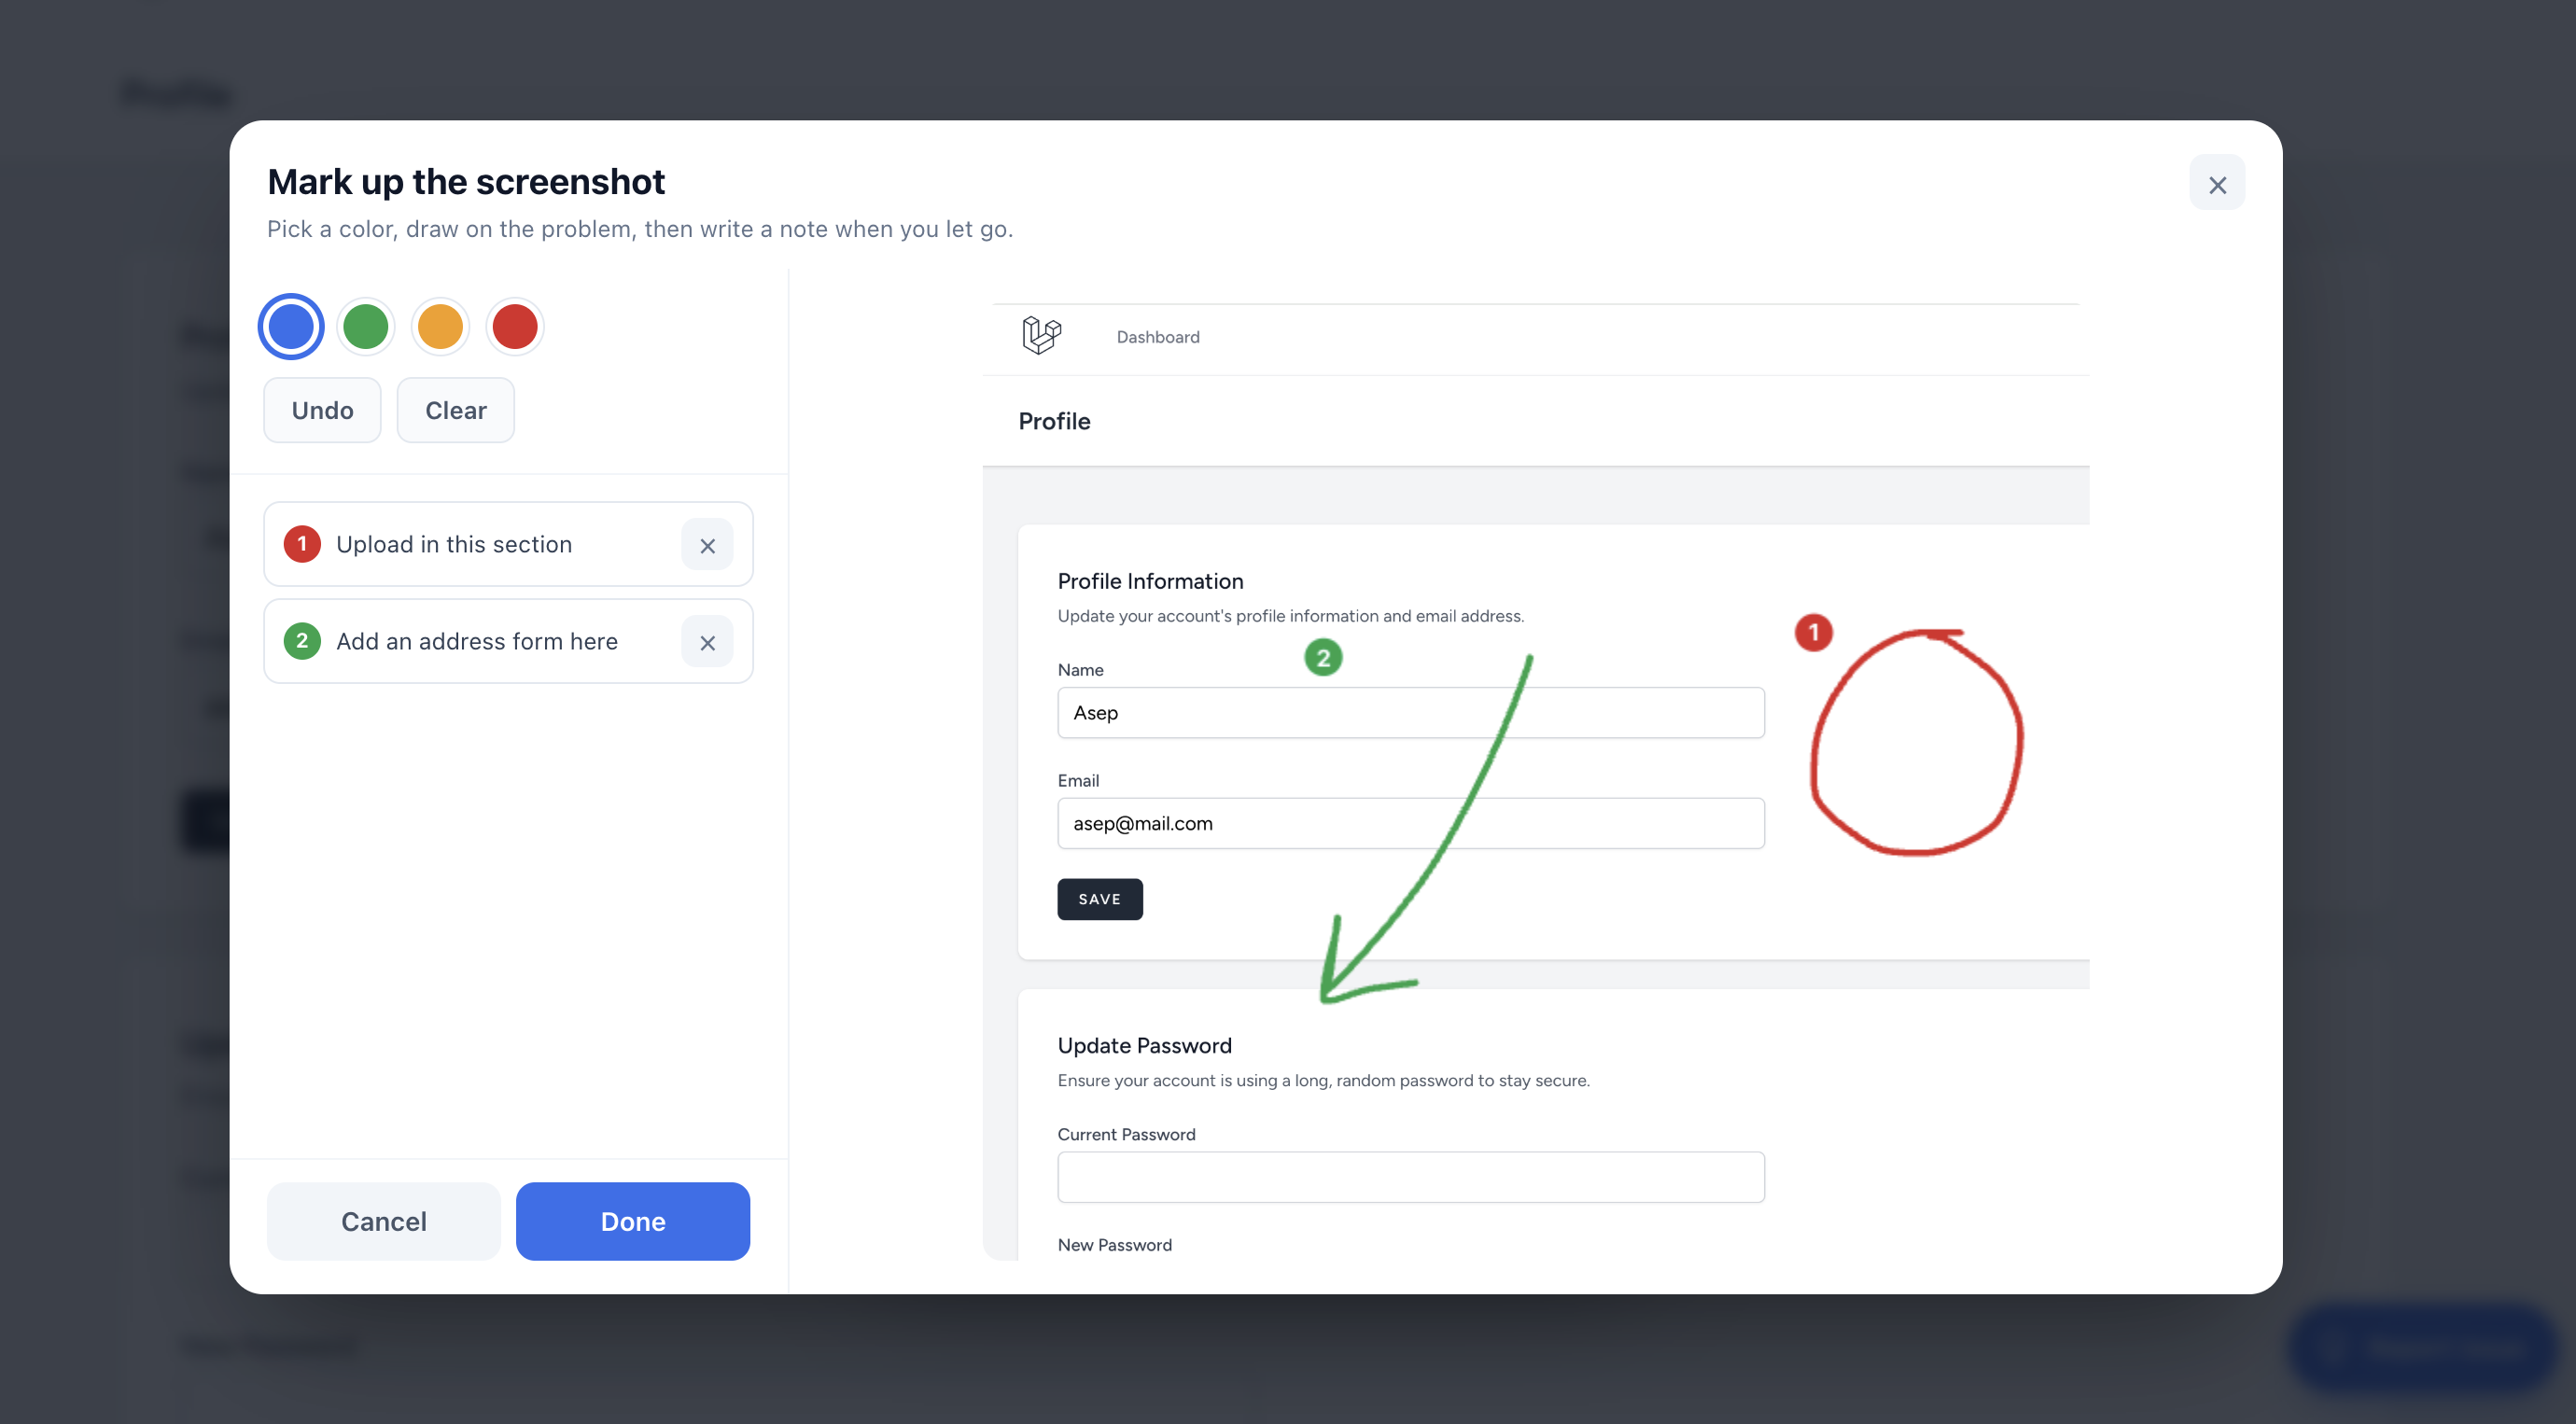
Numbered and color-coded
Every mark that has a note gets a number, and that number shows up in three places at once — on the image, in the side list, and in the issue. The four colors carry meaning:
- Info — a note or question.
- Success — a suggestion or something that should change.
- Warning — a rough edge.
- Danger — a real bug.
What gets sent
The drawing is burned into the image at full resolution, so the marks are part of the picture — they show up wherever the issue is viewed. The notes travel alongside as a numbered list. See The created issue for the result.